How to fill cracks in wood before painting? Wooden surfaces exude timeless elegance and charm, making them a popular choice for various applications, from furniture to interior and exterior trim. However, even the most carefully crafted wood surfaces may produce cracks over time because of factors like changes in temperature, fluctuations in humidity, and general wear and tear.
To ensure a flawless finish and prolong the life of your woodwork, it’s crucial to know how to fill cracks in wood before painting.
Within this all-encompassing guide, we will delve into a wide array of techniques designed to proficiently address the task when you need to fill small cracks and to fill small holes on wood surfaces.
Whether you’re working on a small DIY project or restoring a cherished piece of wood furniture, understanding the nuances of filler of wood, grinding, and painting preparation will help you get good results.

Understanding cracked wood
Before diving into the process of filling cracks in wood, we need to understand various kinds of cracked wood you might encounter and their causes. This knowledge will help you choose the right approach and materials for the paint job.
Wood cracks
- Small cracks
- Large cracks
- Tiny cracks
- Cracked paint
Common causes of cracked wood
- Fluctuations in humidity and temperature
- Aging and drying
- Mechanical stress
- Poorly executed joints
- Wood movement
Understanding the importance to fill small cracks properly
Before we dive into the practical steps of filling cracks in wood, it’s crucial to understand why this step is vital in any painting project. Properly filling cracks in wood serves several purposes:
Aesthetic enhancement
Filling in gaps produces a surface that is smooth and homogeneous, ensuring that your paint job has a faultless look.
Cracked wood and imperfections can be unsightly and make the final coat of paint appear uneven and unprofessional.
Durability
Wood’s structural stability may eventually be compromised by fractures. Filling these gaps increases the longevity of your wooden surfaces and also helps to avoid further damage.
Adhesion
A smooth, filled surface allows the paint to adhere better, ensuring a longer-lasting finish. Paint adhere poorly to uneven or damaged wood surfaces.
Sealing
When you fill cracks in wood, it can also act as a sealant, preventing moisture and other external elements from penetrating the wood, which can lead to further damage and decay.
Step-by-step guide
Now that we understand why it’s essential to fill cracks in wood let’s proceed to the practical steps of how to do it effectively.
Materials and tools you’ll need
It’s important to gather the necessary supplies and tools before starting the crack-filling process. Making sure you have the necessary supplies on hand can simplify and improve the efficiency of the process. What you’ll need is on the following list:
Wood filler: a versatile material known as wood filler was specifically created to repair cracks and fill cracked wood and holes in wood surfaces.
Fine-grit sandpaper: to prepare the wood, make sure it has a smooth surface, and properly smooth out the filled gaps, sandpaper is essential.
Wood glue: wood glue is excellent for repairing cracks or reinforcing larger ones before filling them with wood filler.
Putty knife: a putty knife is used to apply the wood fillers smoothly and evenly.
Vacuum cleaner: after sanding, it is essential to effectively remove dust and debris from the surface of the wood using a vacuum cleaner with a brush attachment.
Masking tape: the tape can be used to create clean lines and prevent excess filler from spreading onto adjacent surfaces.
Liquid epoxy: you can use epoxy components to strengthen the wood before applying wood filler for filling larger cracks or doing structural repairs. This method guarantees a more durable repair and improves the wood’s structural integrity.
Vinyl spackling compound: for minor flaws and cracks, this water-based wood filler is great.
Filling tools: small cracks and holes may be rapidly repaired with filling equipment like filler sticks.
Dye with wood color: a dye that has the same color as the surrounding wood might be helpful if you want the filler’s color to match.
Let’s go on to the step-by-step procedure for filling large holes in wood before painting now that you have your supplies and tools available.
Prepare the wood surface
It’s essential to carefully prepare the surface of the wood before you begin to fill cracks in wood. You must perform the following:
Clean the surface: clean the wood’s surface of any mud, dust, or loose particles. To clean everything completely, use a vacuum with a brush attachment.
Sand the surface: lightly sand the region surrounding the fissures using fine-grit sandpaper. By doing this, a smooth surface is created for the wood filler to cling to.
Inspect for damage: verify the cracks for any structural damage. Consider using epoxy to strengthen weak or badly damaged wood.
Repair small cracks with wood glue
Wood glue fills can be a good fix for minor cracks, especially ones that don’t go all the way through the thickness of the wood. Take these actions:
Apply wood glue: fill the fissure with a small quantity of wood glue.
Spread the glue: spread the glue into the fracture evenly using a putty knife or a moist cloth.
Wipe off excess: apply a moist cloth to any extra glue to remove it. Give the adhesive time to thoroughly dry.
Fill cracks with wood filler
For larger or deeper cracks, use wood filler. Here’s how to do it:
Select the right filler: select a wood filler that complements the hue of your wood or may be tinted to blend in.
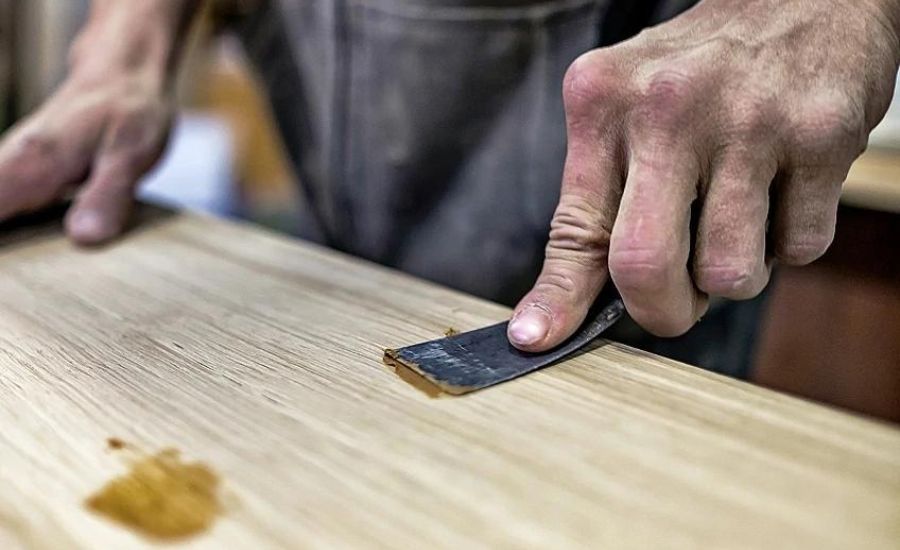
Apply the filler: press the wood filler into the crack with a putty knife, making sure it is filled. As you proceed, resurface the area.
Remove excess filler: using the putty knife, remove any extra filler to provide a surface that is level and smooth.
Let it dry: depending on the product and environmental factors, drying time for wood filler might range from several hours to overnight.

Sand and blend
After the wood filler has dried, it’s time to achieve a seamless finish:
Sand the filled area: by using sandpaper to sand it, the filled region should be leveled with the surface of the surrounding wood. Sand the edges in a circle to make them softer.
Wipe clean: with a fresh, moist towel, remove the sanding dust.
Final surface preparation
Before painting, make sure the wood surface is clean and smooth:
Lightly sand: to maintain a consistent texture, softly sand the whole surface using fine-grit sandpaper.
Remove dust: sanding dust can be removed by wiping the surface with a clean, moist cloth or by using a vacuum with a brush attachment.
Paint
Now that your wood surface is properly prepared and the cracks are filled, you can proceed with painting:
Mask off adjacent areas: to prevent paint spatter on nearby surfaces, use masking tape.
Prime (if necessary): to achieve appropriate paint adherence, depending on your job, you might need to use a primer. the manufacturer’s directions for using the primer.
Paint: apply the paint of your choice in even, fluid strokes.
As instructed by the paint manufacturer, let each layer dry completely.
Apply final coat: apply the final layer for a polished finish when the paint has dried.
Clean up
Clean your equipment and carefully dispose of any debris after finishing your painting endeavor. Your tools will remain in good shape for future use if you clean them properly.
Common challenges and troubleshooting tips
To fill cracks in wood before painting is a valuable skill, but like any DIY endeavor, it can present challenges. Here, we address some common issues and provide troubleshooting tips to help you navigate potential obstacles:
Excessive shrinking or cracking of filler
Issue: sometimes, the wood filler may shrink or develop small cracks in wood as it dries, especially if the crack is deep.
Solution: after the first application of wood filler dries, inspect the filled area. If shrinkage or cracking is evident, apply a second coat of filler to ensure a smooth and even surface. Be sure to let each layer dry completely before sanding.
Color mismatch with surrounding wood
Issue: achieving a perfect color match between the wood filler and the surrounding wood can be challenging, especially with different wood species or aged wood.
Solution: to improve color consistency, consider using wood-colored dye or stain on the filler before applying paint. This can help blend the filled area with the rest of the wood surface more seamlessly.
Difficulty in smoothing the filler
Issue: when you fill larger cracks with wood filler, it may sometimes result in an uneven or rough surface.
Solution: ensure that you spread the filler evenly and smoothly during application. Using a putty knife and keeping it damp can help achieve a smoother finish. Sanding the dried filler with fine-grained sandpaper is also crucial for achieving a polished look.
Adhesion problems with paint
Issue: occasionally, the paint may not adhere well to the filled areas, resulting in a patchy appearance or cracked paint.
Solution: properly sanding and priming the filled areas before painting is essential for achieving good paint adhesion. Also, make sure you’re using the appropriate type of paint for your project and following the manufacturer’s recommendations.
Recurring cracks
Issue: in some cases, cracks may reappear over time, especially if the underlying issue causing the cracks hasn’t been addressed.
Solution: investigate the root cause of the recurring cracks, which could be structural issues or ongoing moisture problems. Addressing these issues is crucial to prevent cracks from returning.
Weather-related challenges for exterior projects
Issue: exterior wood projects can be exposed to harsh weather conditions, which may affect the longevity of crack repairs.
Solution: consider using high-quality, weather-resistant wood fillers or epoxies specifically designed for exterior use.
Apply a durable outdoor paint or sealant to protect the wood and filled areas from moisture and UV damage.
By being aware of these potential challenges and armed with troubleshooting solutions, you can confidently address issues that may arise during your wood crack filling and painting projects. Remember that practice and experience will further enhance your skills, allowing you to tackle more complex projects and achieve professional-quality results.

FAQ
Here are some of the most commonly asked questions on this topic with the following comprehensive answers to them.
How do you fill gaps in wood for painting?
To fill the gap in the wood crack for painting, you can use wood filler or wood putty. First, clean the area, apply the filler or putty with a putty knife, smooth it out, let it dry, sand it down, and then proceed with painting. Proper preparation ensures a smooth and flawless paint finish.
What do you use to fill cracks before painting?
You can use wood filler to fill cracks in wood before painting. Wood filler is specifically designed to repair and fill gaps, cracks, and imperfections in surfaces of wood. It provides a smooth and even base for paint application.
What do you fill exterior wood cracks with?
For exterior wood cracks, it’s essential to use a durable and weather-resistant wood filler or epoxy designed for outdoor use. These products are formulated to withstand exposure to the elements and provide long-lasting crack repair on exterior wood surfaces.
What is the difference between wood filler and wood putty?
Wood filler and wood putty serve similar purposes, but there are some key differences. Wood filler stick is usually a paste-like substance that dries hard and is used for large cracks and holes. Wood putty, on the other hand, is softer and more pliable and is primarily used for smaller repairs.
Wood filler can be sanded and painted over, while wood putty is often used for minor touch-ups and may not hold up as well in larger or high-impact areas.
Conclusion
Learning how to fill cracks in wood before painting is not just a practical skill but an essential one for anyone involved in woodworking or DIY projects. The process outlined in this guide ensures that your wooden surfaces not only look their best but also stand the test of time.
By understanding the importance of crack filling, you’ve taken the first step toward ensuring that your wooden surfaces remain structurally sound and visually appealing. Whether you’re refurbishing wood furniture, renovating your home, or working on outdoor projects, the techniques and materials discussed here empower you to transform cracked wood into a work of art.
In the end, the satisfaction of witnessing a beautifully painted wood surface, free of unsightly cracks, is a testament to your craftsmanship. So, armed with this knowledge, embark on your next painting project with confidence, knowing that you have the skills to create stunning, long-lasting results.
Your efforts to fill cracks in wood before painting will leave a lasting legacy of craftsmanship and creativity in your woodworking endeavors.


